Are we bollocks!!!
We had to make the doorways through the top of the walls which were just under a meter thick.
Once we had the openings roughly the right size we used hard wood dowl pegs in the back of old timbers that we had cleaned up to hold the frameworks in place. All of the timbers used in the doorways we have made were taken out of the old roof and cleaned up using what I call flappy paddle disc.
They are a round normally rubber mounted disc with lots of “flaps” of hard sandpaper set in a circle.
Some are firmer than others but the bendy ones are great for following the natural contours of the wood as you erode away the old crappy bits and reveal the beauty beneath.
The one that leads into the bathroom /office side will never have a door so it is more of a portal.
We still haven’t finished the pointing of them or the blending in but I will take photos soon to show you how they have turned out.
The one that leads into the master bedroom will have a door however we haven’t decided on a style or type yet although my instincts tell me it is likely to be quite rustic.
This is the first one that Mrs B and I did and leads to the bathroom, toilet and office.


Once the uprights are in and the brace bar it is simply a case of filling in with nice faced stone and mortar (3 sand 1 lime 1 sieved mud which is our standard mix for everything to do with stone work in or on the house.)

We also had to begin to build up the gable to get some separation between the two sides of the house and to give some added strength. When I am using concrete block to stone and mud I uses out normal lime mix but if I am using concrete block to concrete block I use sand and cement. The lime mix seems to bond better with the torchis and stone and just seems more natural somehow

This is the doorway through to the main bedroom
First the entrance hole and then with the wood fitted. In the first photo you can see the pins that my building guru put in to help create the downstairs doorway.


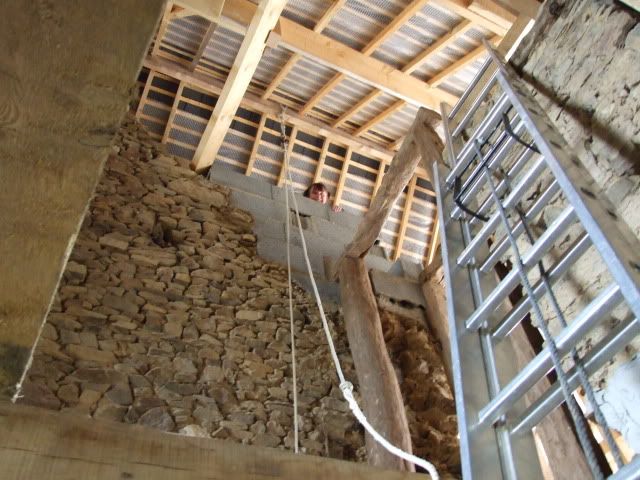
On here you can see the gable being built up with block

And on here you can see a brave Mrs B right at the top filling in the middle of the block work with one hand whilst hanging on with the other.

And this is the roof of the doorway that I made using cedar oak chestnut pine. If I get it right it is going to end up hinged and will be the entrance up into the attic space.

Here you can see both doorways and the landing passageway which will be behind the studwork of what we call the shedroom. The stairs will come up on the left of the photo

We have created a small balcony at the end of the landing that will be open looking down into the front room.
We have had an artisan (and artistic) blacksmith make us some steelwork for this which I will show you in a later installment. It is absolutely wonderful and a classic case of billy&gentley.
But you can get a feel for it and when you stand there you would be able to look out of the eyebrow on that side of the house. The other giving the extra head height for the stairs


I will post later photos to see how the doorways look now but it is fair to say that they have cleaned up a treat.
This is the first doorway that we had to put in and takes you from the kitchen into the studio/ room which has a shower/toilet wet room, big deep sink and washing machine as well as the main thermal store and manifold space for al the heating.
Mrs B made a drawing of how we wanted the door to look and we asked our builder guru if he would do it for us.
The reason I asked a professional to do this is because it was going through the main gable of the house and was just over a meter thick. I had no idea how to approach a job like this and although he did explain how he would do it I did not feel confident about taking it on.
He did it while I was away at sea and before we even did the roof. When we turned up to check it out you could not tell it apart form the drawing.
Its big test was when a neighbour came through and I proudly showed him the new door he said “don’t be silly its always been there” It took me quite a bit of persuasion to convince him that it hadn’t. That is the test of a good design well executed.

\

This is the second doorway cut through by the young carpenter who did the roof with me. Because he knew of out fondness for old wood he asked if he could get expressive with it.


This is the pair of doors together leading form the kitchen into the center of the lounge and into the studio.

Whenever we put in "old reclaimed oak" out finish of choice is Danish Oil. The m,ore coats and a rub down with 0/0 wire wool in between and you end up with a glorious finish that really shows of the wood.
This is what they all look like after a couple of coats of Danish


The next one shows off the doors upstairs along the landing with how they look when against the lime and mud render whihc follows the contours of the old walls. You can also see the end of the curved balcony piece and the eyebrow letting light in on the right. This will be a fixed triangular window

The next photo shows looking the other way to whee the stairs come up. You can see the eyebrow on the left letting in light.

These are the eyebrows from outside to give you a better understanding of them


Here is some more of the interior doorways. This one wont ever have a door fitted as it is just a corridor leading to on the right a bathroom then an office with a loo at the end under the skylight.

These are the sort of tiles that will be going down in the corridors when the time comes. We found them in a an old Chateau hotel we stayed at on a jaunt down to the Med coast for a friends wedding. Groovy.

So onwards and upwards
No comments:
Post a Comment