
We chose a day to do the footings on the back of the weather forecast that said it was going to be overcast.
There was just Mrs B and myself to mix and lay the back wall foundation which was 10 meters long and up to 70 cms wide and 40 or 50 thick in places. We had a fairly early night and were up with the larks fart ready to get mixing.
Now comes the preparation bit:-
We’d had the sand delivered in Big Bags along with gravel in the same which we had lined up next to each other so it was a simple case of dipping into one or the other and then swinging it into the mixer.
The cement was in bags on a pallet next to the mixer so all within shovel reach.
We didn’t have running water at this stage so I had spent a previous day running into the free tap in town and filling every available bucket and container we had. A round trip of 9 miles.
When our visiting Parisian neighbour noticed he asked what I was doing and when I told him we needed lots of water to do the footings he insisted that I cut a hole in the chain link fence and use the water from his well.
I am still thankful for that neighbourly act as it saved me many 9 mile round trips to get water.
I lobbed the first load in which is 4 sand 1 gravel 1 cement which the mixer just about held, we then set up with Mrs B on the mixer and me running the barrows through the house for 18 meters to the footing trench.
As I was fairly quick I could get back in time to help Mrs B do the last of the loading of the mixer.
A great plan, well thought out and it started well but it was somewhat thrown into a shambles as by 1100 the sun was beating down and the temp was up around 30.
BY 1300 Mrs B was flagging under the unrelenting hard physical graft and fierce heat so we had to stop for some rest and lunch.
We had been drinking lots of water but it was hard going.
We had covered about 40% of the trench but it was obvious we needed some extra muscle to get us to the finish line.
Any builder worth his salt will tell you that you should not split pour a foundation as it creates a weakness.
Although we were determined to do all the work ourselves I had to call my mate Kev (the magic digger driver) to come and help with the grunt work after lunch and three hours later the footings were in. Not only was he a magic digger driver but could keep the mixer going flat out.
In the photo of the first barrow load going in you can see the re-enforcing bar box section that was about 10cms square.


We let the concrete go off for a day and then set about getting the two layers of blocks down to bring the back wall up to floor level.


This next shot is looking down the garden and the land will be brought down to halfway up the top blocks if that makes sense. There will be a terrace outside gently sloping away from the house to take any surface water away. (Beneath, if I don't hit too much bed rock will be a couple of rain water harvest tanks but we will come to that later.)
2nd Row the top of this row is basically the damp course level.

Next was to level out the floor.
We did this by setting up the laser again and using the tape on a stick method went round the entire floor at about 1 foot intervals (at dusk to see the laser better) and spray paint marked the high areas of the floor.

Here is MrsB demonstrating the small load method. Perhaps I should have bought a smaller wheelbarrow or bigger shovel. Either way it was how we had to do it as we didnt have the dumper truck now.

We dug these down with a robust SMS hammer drill that you can buy from any DIY store for about 45 quid (even in France)

Which even with earmuffs on can be very noisy as MrsB demonstrates here.

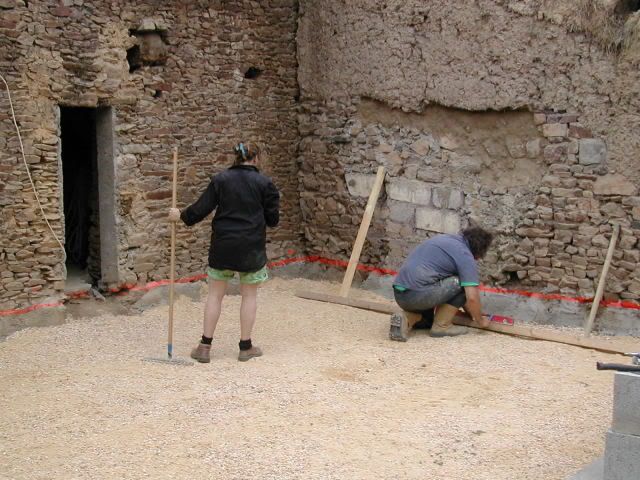
However one must be careful not to criticise the levelling prowess of ones partner

After it is near enough level with all the jaggy bits taken out you bring in the scalpings which is like a flat stone gravel with bits of mush between it.
You would spread this out and then use a “whacker plate” (hire from local hire shop) to bed it down.
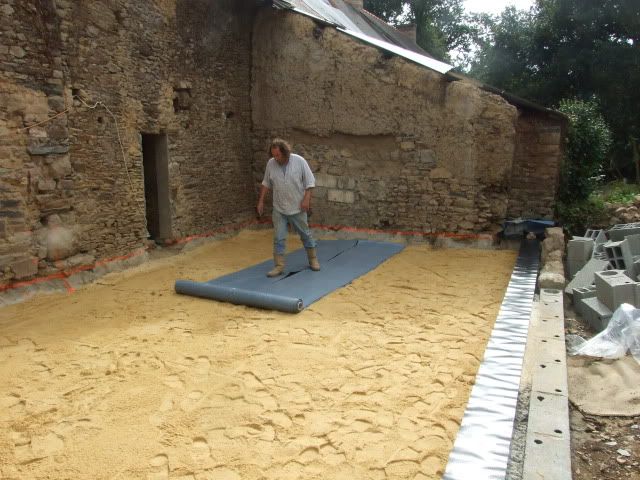
I didn’t have any scalpings so I used the “excess” of gravel I had and then used sand over the top of that which we leveled down with the “welly boot feet together shuffle” method which worked very well and we soon had a fairly smooth level-ish surface on which to lay the waterproof membrane.

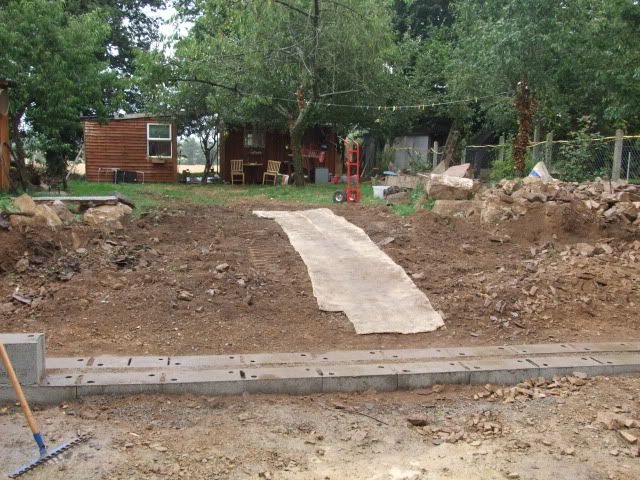
So next it’s the membrane
You can see the damp proof course on top of the blocks and the membrane when laid covers this. This shot also shows the level and smooth finish in the area where the membrane will sit.

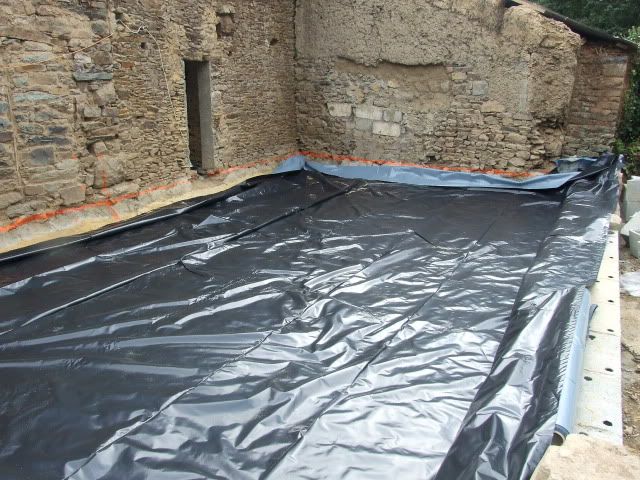


It is then just a case of running electrics, in gain, to where you want them.
Plastic cold water pipe in gain for garden water tap.
Plastic protected copper pipe for the cold water feed and hot water take to where the fire will be, (with hindsight I wish I had bought 28 or even 32 rather than 24mm but I didn’t know at the time. It will still work but bigger would have been better me thinks.)

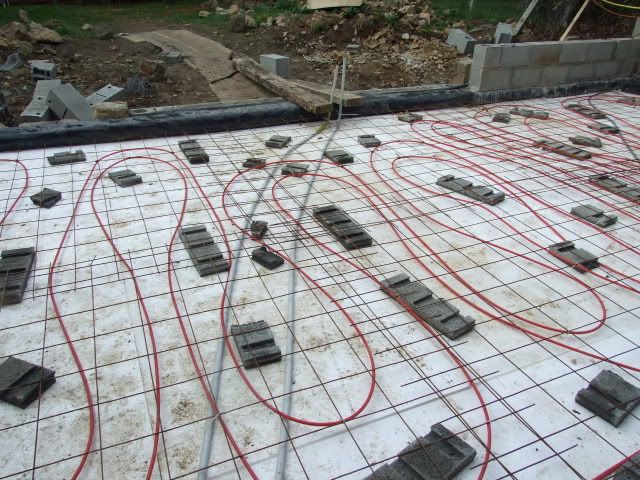
The red stuff is my home made Under Floor heating, working on the principal that if you pump hot water through a concrete block it will get warm.
It is a very rudimentary attempt and the one in the kitchen and studio will be better coiled as in neater and closer together but what you see is two loops.
It is a very rudimentary attempt and the one in the kitchen and studio will be better coiled as in neater and closer together but what you see is two loops.


So once we had all of that in position we ordered the concrete lorry. His conveyor thing wouldn't go through the house so I improvised by using the dumper truck to ferry it round the back
Here is the first load from the concrete truck to the floor


And then
Taaraantarataratara
The floor is in
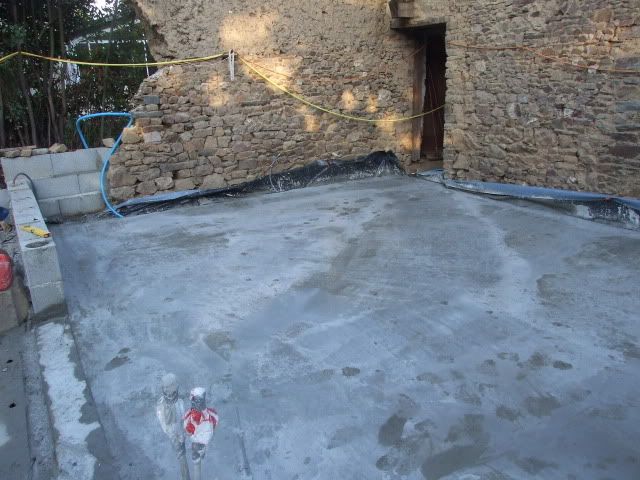

Not too shabby for a seaman and psychotherapist. if I say so myself.
No comments:
Post a Comment